
How-to for Everyone
Explore step-by-step tutorials and expert guidance on art supplies for your creative journey.
Build Artwork Frames
Stretch Canvas Over a Frame
Create Stained Glass Art
Create Ceramics and Pottery
Craft Mosaic Tile Art
Make Wax Candles
Paint With Your Fingers
Create Graffiti Art
Create Abstract Art

How to Build Your Own Artwork Frames
Making custom picture frames lets you tailor your design to perfectly fit your art, décor, or budget. Whether you’re using hardwood, softwood, or reclaimed wood, building frames is straightforward with the right tools and preparation. Below is a complete guide covering everything you need to know—from materials to tools, and the step-by-step process.
Please note, that as an Amazon Associate we earn from qualifying purchases.
Let's get started!
MATERIALS & TOOLS
Materials:
Wood Molding or Frame Stock (choose a profile you like) #ad
Glass or Acrylic Sheet (for glazing) #ad
Mat Board (optional, for decorative border around the picture) #ad
Foam Core or Cardboard Backing #ad
Wood Glue #ad
Finishing materials:
Wood Stain, Paint, Varnish (optional) #ad
Hanging hardware: D-Rings, Wire, Sawtooth Hangers #ad
Flexipoints or Turn Buttons #ad
Tools:
Clamps (especially Corner Clamps) #ad
Sander or Sanding Block #ad
Nail Gun or Hammer #ad
V-nails, Corner Splines, or Staples (optional) #ad
Router (to cut rabbets if not pre-milled) #ad
Glass Cutter (if cutting your own glazing) #ad
Drill (for hardware) #ad
Utility Knife (for matting or backing) #ad
STEP-BY-STEP INSTRUCTIONS
1. Measure Your Artwork
Measure height and width of the artwork.
Add 1/8" to both dimensions for proper fit.
Decide if you’ll include a mat and calculate the mat opening accordingly.
2. Choose & Cut Frame Molding
Select your molding (style, width, wood type).
Cut four pieces with 45° angles using a miter saw.
Two long sides = artwork width + 1/8",
two short sides = artwork height + 1/8".
3. Assemble the Frame
Apply wood glue to the miter joints.
Use clamps or a corner band clamp to hold square.
Reinforce with V-nails, corner splines, or staples (optional).
Let dry overnight.
4. Add Rabbet (if needed)
A rabbet is the ledge on the inside of the frame where the glass and backing rest.
If your wood doesn’t have one, route a ¼" x ¼" rabbet along the back inner edge.
5. Finish the Frame
Sand smooth and clean off dust.
Stain, paint, or clear coat as desired.
Let dry completely before handling.
6. Insert Glass, Mat, Art & Backing
Clean the glass or acrylic.
Layer in order: glass → mat → artwork → backing.
Use flexipoints or turn buttons to secure everything in place.
7. Install Hanging Hardware
For smaller frames, use sawtooth hangers.
For larger/heavier frames, attach D-rings and picture wire.
PRO TIPS
Always make a test miter before cutting final pieces.
Use painter’s tape to pre-align corners before gluing.
For large frames, use corner braces for added strength.
Store glass vertically before assembly to avoid breakage.
Buy extra glass or acrylic—breakage is common during learning.
For archival framing, use acid-free mats and backing.
For more in-depth visual guidance, visit YouTube and search for "how to build your own artwork frames". You'll discover a variety of inspiring videos from fellow enthusiasts to help spark your creativity and keep you motivated.


How to Stretch Canvas Over a Frame
Here's everything you need to know about stretching canvas over a frame, whether you're preparing for painting or framing finished artwork. This step-by-step guide covers materials, tools, techniques, and common troubleshooting tips.
Please note, that as an Amazon Associate we earn from qualifying purchases.
Let's get started!
MATERIALS & TOOLS
Materials:
Canvas (cotton or linen, pre-primed or raw) #ad
Stretcher Bars (or a pre-assembled stretcher frame) #ad
Staples or tacks #ad
Gesso (if you're priming raw canvas) #ad
Sandpaper (optional) #ad
Wood glue (optional, for securing stretcher joints) #ad
Tools:
Staple Gun (manual, electric, or pneumatic) #ad
Canvas Pliers (for pulling canvas tight) #ad
Scissors or Utility Knife #ad
Measuring Tape and Ruler #ad
Paintbrush or Roller (for applying Gesso) #ad
STEP-BY-STEP INSTRUCTIONS
1. Build or Prep the Stretcher Frame
Choose stretcher bars to match the size of your artwork.
Assemble the bars by sliding them together; most have tongue-and-groove corners.
Check for squareness by measuring diagonals; adjust if needed.
Glue the corners and clamp for added strength (optional).
Sand any rough edges that might contact the canvas.
2. Prepare the Canvas
Lay the canvas face-down on a clean, flat surface.
Place the frame centered on top, with 2–3 inches of canvas margin on all sides.
Cut the canvas, leaving enough excess to wrap around the frame and staple to the back.
3. Stretching & Stapling
Use this standard cross-pattern technique to get even tension:
Start on one side: Pull canvas tight with canvas pliers and place the first staple in the center.
Move to the opposite side: Pull tightly and place a staple in the center.
Repeat the same process on the third and fourth sides.
Work outwards from the center, alternating sides (like a compass: N, S, E, W), adding staples every 1–2 inches.
Keep pulling tightly with pliers, especially on larger canvases.
4. Corners
Fold corners neatly by tucking one side under the other.
Make sure there’s no bulky overlap.
Staple securely.
5. Priming the Canvas (if needed)
If using raw canvas, apply at least two coats of gesso.
Let dry completely between coats.
Sand lightly between coats for a smooth surface if desired.
TROUBLESHOOTING & TIPS
Wrinkles or sagging? Mist the back of the canvas lightly with water—it will tighten as it dries.
Loose corners? Re-tuck and re-staple. You can remove and redo a few staples if needed.
Uneven tension? Always work in a cross pattern. Don’t staple one side completely before starting the others.
Frame warping? Use thicker stretcher bars (with center braces) for large canvases (24" and up).
Don't overstretch—tight, but not so tight that it warps the frame.
For more in-depth visual guidance, visit YouTube and search for "how to stretch a canvas over a frame". You'll discover a variety of inspiring videos from fellow enthusiasts to help spark your creativity and keep you motivated.

Creating your own stained glass art is a rewarding and creative process that requires patience, precision, and the right tools. This step-by-step guide covers materials, tools, techniques, and tips for safety and beginners.
Please note, that as an Amazon Associate we earn from qualifying purchases.
Let's get started!
MATERIALS & TOOLS
Materials:
Copper Foil or Lead Came #ad
Pattern Paper and carbon paper #ad
Marker or pen
Flux Remover or glass cleaner #ad
Carnauba Wax #ad
Tools:
Glass Cutter #ad
Scissors #ad
Running Pliers #ad
Grozing Pliers #ad
Soldering Iron and Solder (60/40 tin-lead recommended) #ad
Flux and Flux Brush #ad
Glass Grinder (optional but helpful) #ad
Fid #ad
Safety Gear: gloves, safety glasses, apron #ad
Cutting Mat or newspaper to cover work surface #ad
STEP-BY-STEP INSTRUCTIONS
1. Choose or Draw a Design
Start with a simple pattern, especially if you're a beginner.
Use bold lines and clear shapes.
Make sure each piece is large enough to cut and foil/solder.
2. Create a Template
Print or draw your design on paper.
Make two copies: one for cutting out the pattern pieces and one to assemble the glass pieces on.
Number each piece for easy identification and use color codes if desired.
3. Cut the Pattern Pieces
Cut along the lines of your first pattern copy.
These paper pieces will act as templates to trace onto the glass.
4. Choose and Cut Your Glass
Lay a pattern piece over the appropriate color glass.
Trace around it with a permanent marker.
Use a glass cutter to score along the outline.
Use running pliers to snap the glass along the score line.
5. Grind the Glass (optional but recommended)
Use a glass grinder to smooth the edges and ensure each piece fits precisely.
Clean the pieces afterward to remove dust and glass particles.
6. Apply Copper Foil (if using foil method)
Wrap the edges of each glass piece with sticky copper foil.
Center the foil and press it down evenly.
Burnish (press down) the foil with a fid or smooth tool for strong adhesion.
7. Assemble Your Design
Place all foiled glass pieces over the second copy of your pattern.
Make sure all edges are aligned and the design looks correct.
8. Solder the Pieces Together
Brush flux over the copper foil to help the solder flow.
Use a soldering iron to apply a bead of solder along all seams.
First tack the corners to hold everything in place, then solder the full seams on both sides.
9. Clean and Polish
Once soldering is done and cooled, clean the piece with a glass cleaner or flux remover.
Polish the solder lines with finishing compound or carnauba wax for a nice shine.
10. Add Hanging Hardware (optional)
Solder on rings or loops to the top if you plan to hang the piece.
SAFETY TIPS
Always wear safety glasses while cutting or grinding glass.
Work in a well-ventilated area, especially when soldering.
Avoid touching your face while handling materials and wash your hands afterward.
TIPS FOR BEGINNERS
Practice on scraps. Get a feel for cutting and soldering before starting your main project.
Be patient. Like any craft, it gets easier (and more fun!) with experience.
For more in-depth visual guidance, visit YouTube and search for "how to create your own stained glass artwork". You'll discover a variety of inspiring videos from fellow enthusiasts to help spark your creativity and keep you motivated.
How to Create Your Own Stained Glass Artwork


Ceramics combine artistic creativity with practical use. Each piece can serve as both a form of self-expression and a functional item. What makes the process truly rewarding isn’t just the final product, but the calming, hands-on experience of transforming raw clay into something beautiful and purposeful.
Please note, that as an Amazon Associate we earn from qualifying purchases.
Let's get dirty!
MATERIALS & TOOLS
Materials:
Tools
Pottery Wheel (optional) #ad
Hand Tools (needle tool, sponge, ribs, loop tools) #ad
Pottery Linen (to cover your work surface, even your kitchen table can work) #ad
Access to a kiln (local studios or classes often offer firing services)
Techniques to Try
You don’t need a pottery wheel to make beautiful ceramics. Here are a few beginner-friendly techniques:
1. Pinch a Pot
Start with a ball of clay and shape it by pinching with your fingers. This is one of the oldest and simplest forms of pottery.
2. Build a Coil
Roll clay into long “snakes,” stack them to build walls, and smooth as you go. This method is great for building larger pieces.
3. Build a Slab
Roll clay into flat slabs and cut shapes to construct boxes, plates, or abstract sculptures.
4. Throw a Wheel
If you’re drawn to symmetrical, rounded forms like bowls or vases, try a pottery wheel. It takes practice but is incredibly rewarding.
The Firing Process
Clay isn’t durable until it’s fired in a kiln. There are two main firings:
1. Bisque Firing
Once your piece is completely dry (called bone dry), it’s fired for the first time. This hardens the clay and prepares it for glazing.
2. Glaze Firing
After applying glaze, your piece is fired again at a higher temperature. This melts the glaze into a smooth, glass-like coating.
Glazing and Finishing
Glazes can be shiny, matte, colorful, earthy — or all of the above. They transform your piece into something that’s not only beautiful but food-safe and functional (if desired).
Glazing can be brushed, dipped, poured, or sprayed depending on the look you want. Just make sure to clean the bottom of your piece — glaze can fuse to the kiln shelf!
FINAL TIPS
Be patient. Drying and firing take time.
Embrace imperfection. The charm of handmade pottery is in its quirks.
Start small. A tiny dish or simple cup is a perfect first project.
Take a class. Local studios offer invaluable guidance and access to equipment.
Experiment. Try carving, stamping, or adding texture to personalize your work.
For more in-depth visual guidance, visit YouTube and search for "how to make your own pottery". You'll discover a variety of inspiring videos from fellow enthusiasts to help spark your creativity and keep you motivated.
How to Create Your Own Ceramics & Pottery

How to Craft Your Own Mosaic Tile Artwork
Creating mosaic tile art is a fun and rewarding process that allows you to make intricate designs using small pieces of materials like glass, ceramic, stone, or even recycled objects. Here’s a step-by-step guide to help you get started.
Please note, that as an Amazon Associate we earn from qualifying purchases.
Let's get start to puzzle!
MATERIALS & TOOLS
Materials:
Tiles
Base
Wood Sealer (to prevent moisture damage) #ad
Pattern Paper (to sketch your design) #ad
Adhesive
Tile Glue #ad
Thinset Mortar #ad
PVA Glue (depending on your project) #ad
Grout #ad
Tools
Tile Nippers (for cutting tiles) #ad
Pencil and Ruler (for sketching the design)
Safety Gear
Gloves #ad
Safety Glasses #ad
Apron #ad
Trowel (to apply adhesive) #ad
Sponge and Bucket (for cleaning grout) #ad
1. Plan Your Design
Sketch your design on paper first.
Simplify complex shapes and use bold, clear outlines.
Choose a color palette that complements your theme.
Transfer the design to your base using a pencil.
2. Prepare the Base
Make sure the base is clean, dry, and smooth.
If using wood, seal it to prevent moisture damage.
3. Cut and Arrange Tiles
Use tile nippers to cut tiles into desired shapes.
Dry-lay your pieces over the sketch to visualize spacing and placement.
Adjust spacing—usually 1/8" (3 mm) is ideal between pieces.
4. Adhere the Tiles
Apply adhesive with a trowel or glue directly on the back of each piece.
Press tiles firmly onto the base.
Let it dry for 24 hours.
5. Apply the Grout
Mix grout as per the instructions.
Spread it over the entire piece using a rubber float or spatula.
Push grout into the spaces between tiles.
6. Clean and Finish
After 15–30 minutes, wipe off excess grout with a damp sponge.
Let the grout cure (usually 24–48 hours).
Polish the tiles with a soft cloth after it's fully dry.
TIPS FOR BEGINNERS
Start with a small project (e.g., coaster, flowerpot, or trivet).
Use pre-cut tiles or mosaic kits to save time.
Wear gloves when handling sharp glass or ceramic.
Experiment with broken dishes for a unique, upcycled look ("pique assiette" style).
For more in-depth visual guidance, visit YouTube and search for "how to make your own mosaic". You'll discover a variety of inspiring videos from fellow enthusiasts to help spark your creativity and keep you motivated.
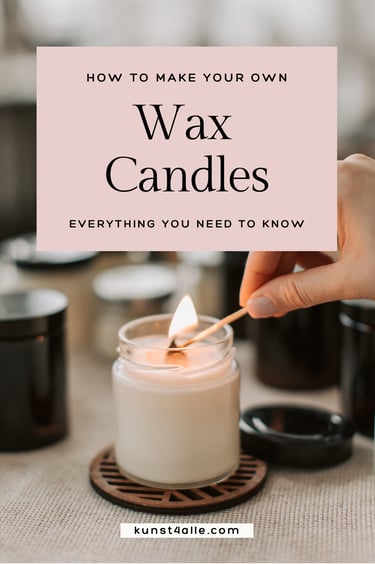
How to Make Your Own Wax Candles
Whether you want to set a cozy mood, craft personalized gifts, or launch your own candle-making business, this guide covers the essentials of making wax candles at home.
Please note, that as an Amazon Associate we earn from qualifying purchases.
Let's heat it up!
MATERIALS & TOOLS
Materials:
Wax
Soy Wax #ad
Beeswax #ad
Paraffin Wax #ad
Coconut Wax #ad
Wicks (size depends on your container) #ad
Essential Oils (optional) #ad
Candle Dye or Natural Colorants (optional) #ad
Containers
Tools
Double Boiler or a Heat-safe Pouring Pitcher #ad
Thermometer (wax temperature is important!) #ad
Spoon #ad
Wick Holders (or Pencil, Chopstick, or a Wick Centering Tool) #ad
Scale (for measuring wax and fragrance) #ad
1. Prepare Your Workspace
Cover surfaces with newspaper or parchment to catch any spills. Set out all your supplies and containers.
2. Measure and Melt the Wax
Weigh your wax based on the size of your container. Use a double boiler to gently melt the wax, stirring occasionally. Keep an eye on the temperature—most waxes melt between 120°F and 180°F, depending on the type.
3. Add Fragrance and Color
Once melted, let the wax cool slightly (usually around 150°F) before adding fragrance oil or essential oils. Stir gently but thoroughly. If using dye, add it now as well.
4. Secure the Wick
While the wax cools, attach the wick to the center of your container using glue dots or a bit of melted wax. Use a wick holder to keep it upright.
5. Pour the Wax
Slowly pour the wax into your container, leaving a bit of space at the top. Be careful not to move the wick too much.
6. Let It Cool
Allow the candle to cool completely at room temperature—this can take several hours. Avoid placing it in the fridge, as it can cause cracking.
7. Trim the Wick
Once the wax is fully set, trim the wick to about ¼ inch. This helps the candle burn evenly and safely.
CANDLE-MAKING TIPS
Test burn your candles to make sure the wick and wax work well together.
Label your candles with scent names, burn instructions, and ingredients if you plan to give them away or sell them.
Experiment! Try layered candles, embedded herbs, or natural essential oil blends for unique results.
For more in-depth visual guidance, visit YouTube and search for "how to make your own wax candles". You'll discover a variety of inspiring videos from fellow enthusiasts to help spark your creativity and keep you motivated.
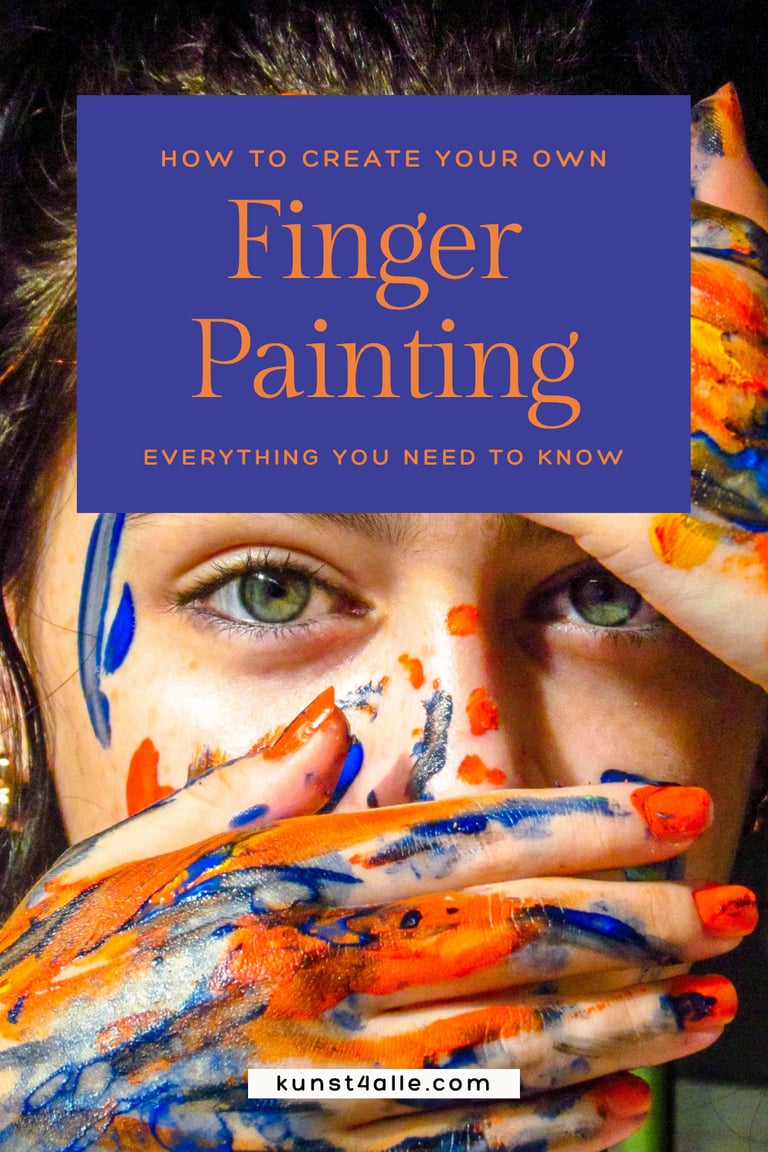

How to Create Your Own Fingerpainting
Fingerpainting isn’t just for toddlers — it’s a joyful, tactile art form that invites anyone to unplug, get messy, and tap into pure creativity. Whether you're an adult looking to destress or a parent planning an afternoon of fun with your kids, fingerpainting is easy to start and incredibly rewarding.
In this guide, we’ll show you how to create your own fingerpainting artwork from scratch. No fancy supplies or formal training needed — just your hands, your imagination, and a few basic materials.
Please note, that as an Amazon Associate we earn from qualifying purchases.
Dip in!
MATERIALS
Paper or Canvas #ad
Thick paper like
Cardstock #ad or
Watercolor Paper works best to avoid tearing. #ad
Paint
Washable, non-toxic paint
Acrylic #ad or
Tempera #ad
For young kids, make sure it’s child-safe. #ad
Palette or Plate #ad
For holding and mixing colors.
Cloth or Wet Wipes
Things will get messy.
Apron or old clothes
Masking Tape #ad
Bowl of water
1. Set Up Your Space
Choose a well-lit area with easy-to-clean surfaces. Lay down some newspaper or a plastic tablecloth if you’re working indoors. If you’re outside, even better — just bring a damp cloth for cleanup.
2. Prepare Your Paint
Squeeze a few blobs of different paint colors onto your plate or palette. Keep the colors separated at first, but don’t be afraid to blend them later with your fingers for fun new shades.
3. Start Painting
There are no rules here. Dip your fingers into the paint and explore! Try:
Dots and dabs: Tap your fingers to make polka dots or texture.
Swirls and streaks: Drag your fingers to create motion.
Layering: Let one color dry and then paint over it for depth.
4. Experiment With Techniques
Use different parts of your hand — fingertips, knuckles, even the side of your palm. You can also press objects like sponges or leaves into the paint for cool effects.
5. Let It Dry
Once you’re happy with your creation, set it aside to dry flat. Depending on the thickness of the paint, it may take anywhere from 30 minutes to a few hours.
Creative Ideas to Try
Nature scenes: Use your fingers to make trees, flowers, or clouds.
Abstract art: Blend colors freely and go with the flow.
Finger-painted cards: Great for handmade gifts or holiday greetings.
Collaborative art: Paint with a friend or family member on the same page.
TIPS FOR A BETTER FINGERPAINTING EXPERIENCE
Keep a small bowl of water nearby to rinse fingers between colors.
Use painter’s tape to frame your paper and peel it off later for clean edges.
Don’t aim for perfection — fingerpainting is all about freedom and expression.
For more in-depth visual guidance, visit YouTube and search for "how to create your own fingerpainting". You'll discover a variety of inspiring videos from fellow enthusiasts to help spark your creativity and keep you motivated.
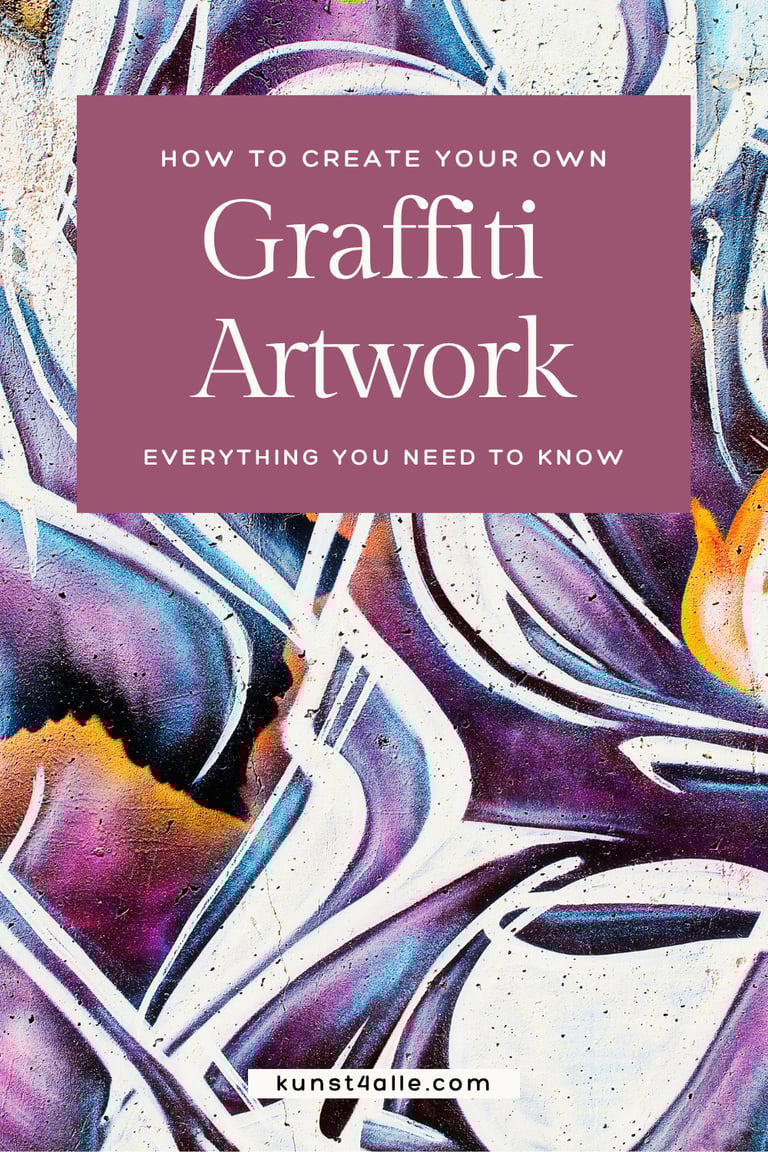

How to Create Your Own Graffiti Artwork
Creating your own graffiti is a creative and expressive process that blends drawing, lettering, and often social or personal messages. Here’s a step-by-step guide to help you get started.
Please note, that as an Amazon Associate we earn from qualifying purchases.
1. Understand Graffiti Styles
Before starting, study different styles to get inspired:
Tag – Simple, stylized signature.
Throw-up – Bubble letters or simple shapes, quick to do.
Piece – Short for “masterpiece”, complex and colorful.
Wildstyle – Complicated and abstract letters, often hard to read.
Stencil – Pre-cut template sprayed for repetition.
Character art – Cartoons or realistic figures alongside lettering.
Use apps like Pinterest or Instagram, or search graffiti books and documentaries (like Style Wars or Bomb It).
2. Sketch Your Design on Paper
Start on paper before using any wall or digital tool:
Choose a word or name – Usually 3–6 letters works well.
Draw bubble or block letters – Start simple.
Add style – Use arrows, highlights, drips, 3D effects.
Include a background or character (optional).
Incorporate colors – Use colored pencils or markers to test color schemes.
Tip: Trace over letters multiple times to improve structure and balance.
3. Practice Digitally (Optional)
If you prefer designing digitally:
Use apps like Procreate, Adobe Fresco, or free tools like Krita, GIMP, or Graffiti Creator websites.
Work in layers to sketch, ink, and color.
4. Choose Your Surface
Legal Walls: Look for community graffiti walls or contact property owners.
Canvases or Boards: Great for practicing legally and displaying art.
Sketchbooks/Blackbooks: Graffiti artists often keep a “blackbook” for ideas.
5. Pick Your Tools
Spray Paint:
Brands like Montana, Ironlak, or Krylon are popular. #ad
Choose different Caps/Nozzles for thin or fat lines. #ad
Other Materials:
Chalk: For outlines. #ad
Markers: For outlines or small surfaces. #ad
Stencils: For repeating designs. #ad
Protective Gear:
Canvas or Board: Great for practicing legally. #ad
6. Prep the Surface
Clean your wall/canvas if needed.
Apply a base coat (white/neutral) to help your colors pop.
7. Start Painting
Outline with chalk or light spray.
Fill in your letters with base color.
Add shadows, highlights, and details layer by layer.
Finish with a clean outline and background effects.
Take breaks and step back to see the piece as a whole.
8. Clean Up
Properly dispose of cans and caps.
Wash hands and tools.
Photograph your work to build a portfolio!
LEGAL NOTE
Always ask permission before painting on someone else's property. Illegal graffiti can lead to fines or charges.
For more in-depth visual guidance, visit YouTube and search for "how to create your own graffiti artwork". You'll discover a variety of inspiring videos from fellow enthusiasts to help spark your creativity and keep you motivated.
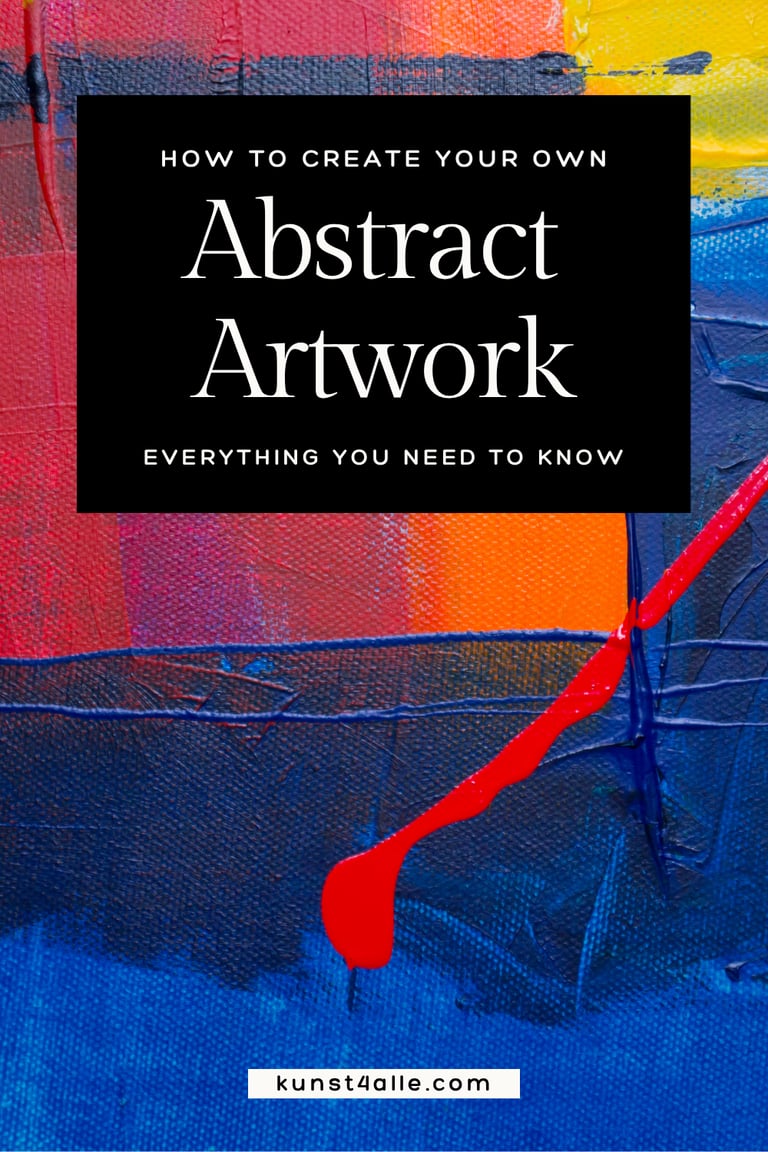
How to Create Your Own Abstract Artwork
Creating your own abstract art can be both expressive and freeing. Here’s a step-by-step guide to help you get started.
Please note, that as an Amazon Associate we earn from qualifying purchases.
Let's get started!
1: Gather Your Materials
You’ll need:
Surface:
Canvas #ad
Paper #ad
Wood Panel #ad, etc.
Paints:
Acrylics #ad (great for beginners)
Oils #ad
Watercolors #ad
Mixed media work too.
Brushes & Tools:
Brushes #ad
Palette Knives #ad
Sponges #ad
or even your hands.
Extras (optional):
Masking Tape #ad
Stencils
Texture Paste #ad
Charcoal #ad, etc.
2: Choose Your Color Palette
Decide whether you want vibrant, soft, or monochromatic tones.
Use a limited palette (3–5 colors) to keep it cohesive.
You can pick colors based on emotion (e.g. blues for calm, reds for energy).
3. Decide on a Concept or Emotion
While abstract art is non-representational, having an inspiration helps:
Emotions: Anger, joy, confusion, peace.
Nature: Wind, water, fire.
Music: Let a song guide your brushstrokes.
Or go fully intuitive, painting without a plan.
4. Start with a Background
Paint the canvas with a base color or a blend of colors.
Use wide brushes or sponges.
Don’t worry about details — this is just your foundation.
5. Build Layers & Texture
Add new shapes, lines, or patches of color.
Try using:
Brushes for strokes.
Palette knives for scraping/texture.
Drips, splashes, or smears.
Experiment with transparency by mixing water or medium into your paint.
6. Experiment and Respond
Let your intuition guide you.
Rotate the canvas if stuck.
Ask yourself:
Does it feel balanced?
Does something need to be emphasized or covered up?
Abstract art often evolves through trial and response.
7. Refine Your Composition
Look for:
Visual balance (symmetry or asymmetry).
Contrast (light vs. dark, smooth vs. rough).
Rhythm or repetition.
Add final details or highlights to draw the eye.
8. Know When to Stop
Step back and view it from a distance.
If it feels done, don’t overwork it.
Sometimes less is more.
9. Sign It and Seal It
Add your signature discreetly.
Use a clear varnish to protect your artwork (especially if using acrylics or oils).
TIPS:
Practice on small pieces first.
Try collage or mixed media for added depth.
Don’t be afraid to paint over what you don’t like.
Keep a sketchbook for abstract ideas or color tests.
For more in-depth visual guidance, visit YouTube and search for "how to create your own abstract artwork". You'll discover a variety of inspiring videos from fellow enthusiasts to help spark your creativity and keep you motivated.

How to Create Your Own Clay Sculpture
Unlike painting or drawing, which typically unfold on flat surfaces, sculpture inhabits space. It demands to be seen from multiple angles, inviting viewers to walk around and experience it in three dimensions.
Here's a step-by-step guide on how to create a sculpture, focusing on a traditional clay sculpture, which is a great medium for beginners and professionals alike.
Please note, that as an Amazon Associate we earn from qualifying purchases.
Let's get started!
MATERIALS & TOOLS
Clay
Air-dry #ad
Oil-based #ad
Polymer #ad
Water-based #ad
Armature Materials
Wire Mesh #ad
Aluminum Foil #ad
Wood Base – for larger sculptures) #ad
Sculpting Tools (loop tools, ribbon tools, knife, smoothing tools) #ad
Spray Bottle (for water-based clay to keep it moist) #ad
Apron and surface protection #ad
1. Plan Your Sculpture (Concept & Design)
Decide on your subject: Animal, human figure, abstract form, etc.
Sketch your idea: Draw it from multiple angles (front, side, back, top).
Choose a scale: How big will it be? Start small for practice.
2. Build the Armature (for larger pieces)
Make a support structure: Use wire or foil to shape the basic form.
Secure it to a base: Helps keep your sculpture stable as you work.
Add bulk: Use foil or newspaper to pad areas, saving clay and weight.
3. Apply the Clay
Cover the armature with clay: Start rough, just get the basic shape.
Press and smooth clay firmly: Make sure it adheres well to the structure.
4. Refine the Form
Add detail gradually: Work from general shape → medium detail → fine detail.
Use reference images if you’re doing something realistic.
Keep clay moist (if water-based) by misting occasionally.
5. Texture and Detailing
Use tools, fingers, or even everyday objects (toothbrush, sponge, fabric) to:
Carve fine lines
Create skin, fur, or fabric textures
Smooth or roughen surfaces for effect
6. Final Touches
Double-check proportions and symmetry
Clean up surfaces with water or smoothing tools
Remove stray marks and fingerprints
7. Drying or Baking
Air-dry clay: Let it dry slowly and evenly (can take 1–3 days)
Polymer clay: Bake in an oven according to package instructions
Oil-based clay: Doesn’t harden—good for molds or casting
8. Painting & Finishing (Optional)
Sand gently if needed after drying
Prime the surface before painting (if clay type requires it)
Paint with acrylics or other suitable paint
Seal with a matte or gloss finish for protection
9. Display or Store
Mount it on a stand or base
Keep it in a dry, safe place (especially fragile or air-dry sculptures)
For more in-depth visual guidance, visit YouTube and search for "how to create your own clay sculpture". You'll discover a variety of inspiring videos from fellow enthusiasts to help spark your creativity and keep you motivated.

How to Make Your Own Patchwork Quilt
What makes quilting truly artistic is the design process. Patterns can be traditional—like the Log Cabin, Flying Geese, or Double Wedding Ring—or completely original. Some quilters follow patterns passed down for generations; others improvise as they go, letting intuition lead the way.
Here's a step-by-step guide for how to make a quilt, written in a beginner-friendly way. This will cover making a simple patchwork quilt, which is great for first-time quilters.
Please note, that as an Amazon Associate we earn from qualifying purchases.
Let's stitch it together!
MATERIALS & TOOLS
Materials
Quilting Fabric 100% cotton (for top layer) #ad
Batting (middle layer) #ad
Backing Fabric (for the bottom layer) #ad
Quilting Thread #ad
Tools
Rotary Cutter or Fabric Scissors #ad
Quilting Ruler #ad
Cutting Mat (if using rotary cutter) #ad
Sewing Machine or Needle (if sewing by hand) #ad
Safety Pins or Basting Spray #ad
Iron and Ironing Board #ad
1. Choose a Quilt Pattern
Start with something simple like squares or strips.
You can sketch your layout or use free online quilt patterns.
2. Cut Your Fabric
Wash, dry, and iron your fabric first (prevents shrinking).
Cut your fabric into uniform pieces (e.g., 5”x5” squares for a patchwork quilt).
Keep edges neat and measurements precise for easier sewing.
3. Arrange the Quilt Top
Lay out your fabric pieces on the floor or a design wall.
Rearrange until you’re happy with the layout.
Take a photo to remember your arrangement.
4. Sew the Quilt Top
Sew squares together row by row, right sides facing.
Press seams flat after sewing each row (all in one direction or open).
Then, sew the rows together, matching seams carefully.
Press the whole quilt top once it's assembled.
5. Make the Quilt Sandwich
Layer your quilt in this order:
Backing fabric (right side down)
Batting
Quilt top (right side up)
Smooth each layer to avoid wrinkles. Use safety pins or basting spray to secure all layers.
6. Built the Layers
Quilt by hand or use a sewing machine.
Stitch “in the ditch” (along seams), or try diagonal or grid lines.
Start quilting from the center and work outward to avoid bunching.
7. Trim the Edges
Trim the excess batting and backing to match the quilt top.
Make sure all layers are smooth and even.
8. Add the Binding
Cut strips of fabric (2.5” wide), sew them into one long strip.
Fold in half lengthwise and press.
Sew the binding to the front of the quilt, then fold over and hand-stitch it to the back for a clean finish.
9. Finish and Label
Inspect for loose threads or missed stitches.
Add a custom label with your name and date (optional).
Wash and dry your quilt to soften it.
For more in-depth visual guidance, visit YouTube and search for "how to make your own patchwork quilt". You'll discover a variety of inspiring videos from fellow enthusiasts to help spark your creativity and keep you motivated.

How to Create Your Own Pencil Drawing
Whether you're a complete beginner or returning to drawing after a break, this guide will help you build confidence, improve observation, and develop your own creative voice—one step at a time.
Please note, that as an Amazon Associate we earn from qualifying purchases.
Let's get started!
1. Gather Simple Materials
Start with the basics. No need for expensive tools.
What you need:
Sketchbook or Blank Paper #ad
Graphite Pencils #ad
Sharpener #ad
Pens or Colored Pencils for fun (optional) #ad
Goal: Keep it simple so you're not overwhelmed by gear.
2. Set Up a Drawing Space
You don’t need a fancy studio—just a clean, comfortable space with good lighting. Try to avoid drawing in the dark or under overly yellow light. Natural daylight is best.
Optional: Play calm music or ambient sounds to help you focus.
Goal: Create a relaxing, distraction-free space that invites creativity.
3. Warm Up With Simple Exercises
Before diving into full drawings, loosen up with basic hand-eye coordination exercises:
Try this:
Draw circles, loops, and straight lines
Fill a page with quick shapes (squares, triangles, spirals)
Practice shading from light to dark with pencil pressure
Goal: Train your hand and wrist, and get comfortable with your materials.
4. Learn to See Like an Artist
Drawing is more about seeing than knowing. Focus on observation over perfection.
Start with:
Contour drawing: Slowly trace the outline of an object with your eyes, and draw it without lifting your pencil.
Blind contour: Do the same, but don’t look at your paper while drawing.
Goal: Improve your observation and coordination.
5. Practice Basic Shapes
Everything you’ll ever draw is built from basic shapes.
Practice drawing:
Circles, ovals, rectangles, cubes, cones, and spheres
Simple 3D forms with shading
Goal: Build a strong foundation in structure and form.
6. Start Drawing Real Objects
Now it’s time to try drawing from life. Choose something simple like:
A cup or mug
A fruit (apple, banana)
A shoe
Tips:
Start with light sketch lines
Observe shadows and highlights
Don't worry about details at first
Goal: Translate what you see into lines and values.
7. Keep a Sketchbook and Draw Often
Treat your sketchbook like a visual journal. Fill it with:
Doodles
Studies
Notes or ideas
Daily sketches (even 5–10 minutes helps)
Goal: Build consistency. Drawing is a skill that improves with regular practice.
8. Try Different Styles and Subjects
Once you're comfortable, begin exploring:
Cartoons and characters
Portraits
Landscapes
Still life
Abstract or imaginative work
Look at how other artists approach line, color, and composition. Try copying a masterwork (for practice—not to claim as your own).
Goal: Discover what excites and inspires you.
9. Learn the Basics of Shading and Light
Understanding how light works will make your drawings more realistic.
Practice:
Light source and shadow
Soft vs hard edges
Gradual shading (smooth transitions)
Cross-hatching (lines for texture and value)
Goal: Add depth and realism to your drawings.
10. Be Patient and Enjoy the Process
Progress takes time. You’ll make mistakes. You’ll draw things you hate. That’s normal—and necessary.
Don’t compare yourself to others. Instead, compare today’s sketch to the one you did last week or month. Growth is in the doing.
Final Goal: Fall in love with the process, not just the results.
Final Tip
“Draw what you see, not what you think you see.”
Train your brain to slow down and truly observe. That’s where drawing starts to come alive.
For more in-depth visual guidance, visit YouTube and search for "how to draw with pencils". You'll discover a variety of inspiring videos from fellow enthusiasts to help spark your creativity and keep you motivated.
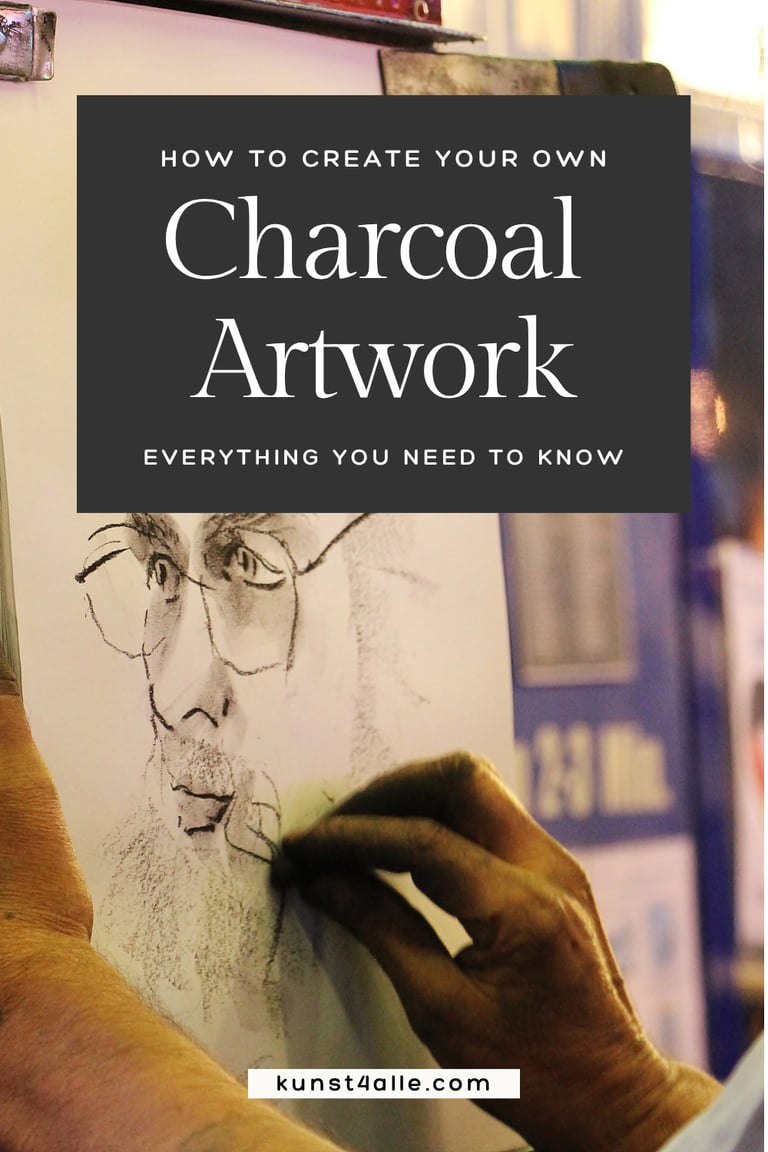

How to Create Your Own Charcoal Artwork
Whether you're a seasoned artist or a beginner drawn to the smudgy elegance of monochrome art, sketching with charcoal is an invitation to embrace imperfection, spontaneity, and depth. Here are detailed instructions.
Please note, that as an Amazon Associate we earn from qualifying purchases.
Let's get started!
Materials You’ll Need:
Charcoal Sticks
Vine #ad
Compressed #ad
Charcoal Pencils (optional for detail) #ad
Kneaded Eraser #ad
Blending Stumps or tissues #ad
Fixative Spray
Drawing Paper (textured preferred, like newsprint or charcoal paper) #ad
Drawing Board (optional, to hold paper) #ad
1. Set Up Your Space
Choose a well-lit area, ideally with side lighting to highlight shadows.
Secure your paper to a sturdy drawing board.
Keep your tools accessible and hands clean (charcoal smudges easily).
2. Choose and Observe Your Subject
Pick a simple subject to start—still life, portrait, or figure.
Spend a few minutes observing shapes, values, and composition.
3. Light Gesture Drawing (with vine charcoal)
Use light, sweeping lines to map out basic shapes and proportions.
Keep your hand loose—you're laying a foundation, not making details.
Avoid pressing hard; you’ll want to adjust easily.
4. Block in Shapes and Values
Begin shading large shapes, separating light, midtone, and dark areas.
Use the side of the charcoal for broad coverage.
Vine charcoal is easy to erase and adjust—use it for early shading.
5. Define Edges and Forms
Switch to compressed charcoal or a charcoal pencil for darker values and edges.
Define contours and more accurate details slowly.
Keep checking proportions.
6. Blend and Soften
Use a blending stump, finger, or tissue to smooth transitions in value.
Don’t over-blend; leave some texture for interest.
Use a kneaded eraser to lift highlights or adjust shapes.
7. Add Details and Texture
Use sharper charcoal or a pencil for fine lines and textures (hair, wrinkles, fabric folds).
Press kneaded eraser into the drawing to create light spots and reflected light.
8. Fix and Preserve
Step back to assess the piece.
Use a workable fixative to set layers before adding more, or a final fixative when finished.
Spray outdoors or in a ventilated area, holding the can 10–12 inches away.
Tips for Best Results
Charcoal is forgiving—don't be afraid to erase or restart parts.
Try different papers for different effects.
Keep a scrap sheet nearby for testing pressure or value.
For more in-depth visual guidance, visit YouTube and search for "how to sketch with charcoal". You'll discover a variety of inspiring videos from fellow enthusiasts to help spark your creativity and keep you motivated.
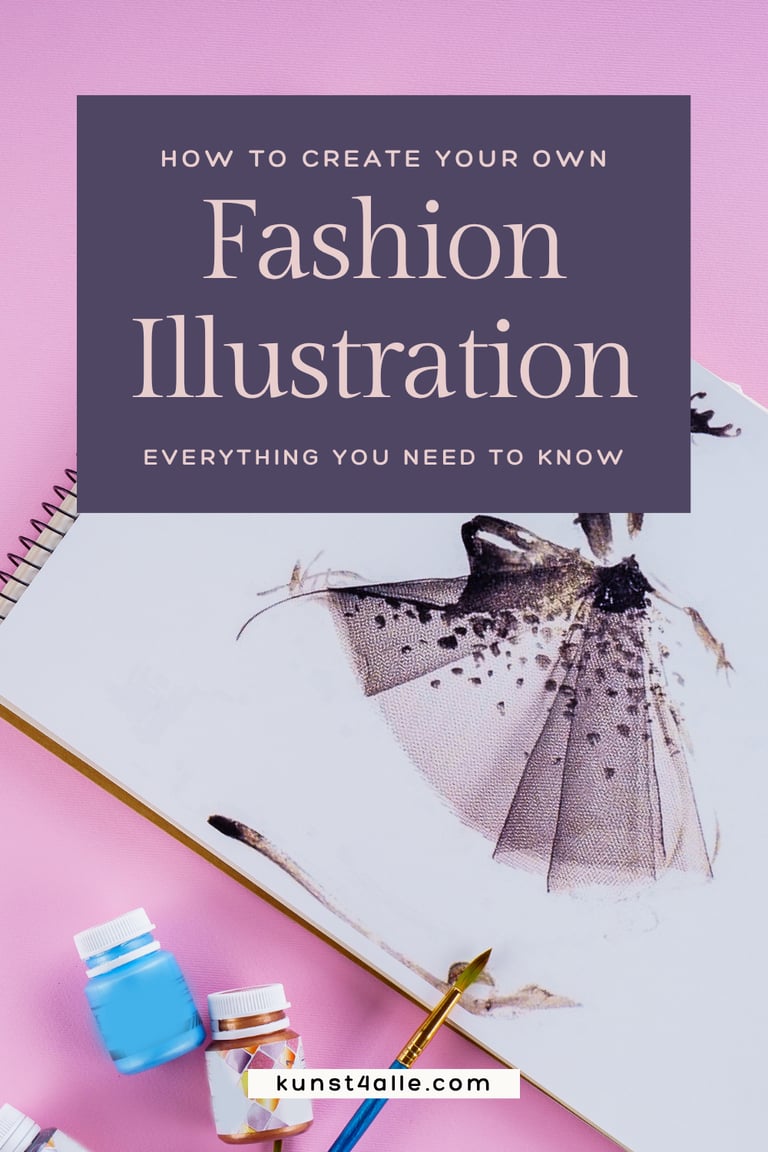
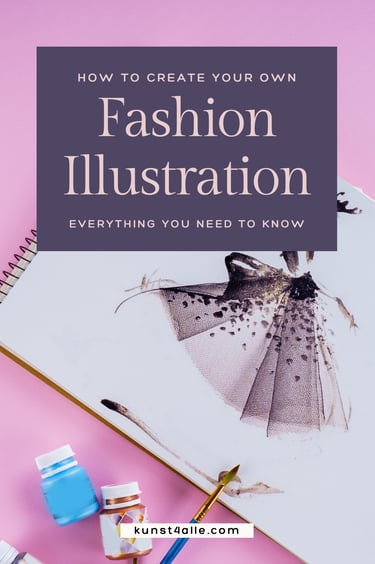
How to Create Your Own Fashion Illustration
The art of fashion illustration is far from obsolete—it’s a vibrant, evolving medium that continues to inspire. In a fast-paced fashion industry, it reminds us to slow down and appreciate the artistry behind every hem and silhouette.
Here’s a step-by-step guide for getting started with fashion illustration, whether you’re a beginner artist, aspiring designer, or just curious about the process.
Please note, that as an Amazon Associate we earn from qualifying purchases.
Let's get started!
Gather Your Basic Tools
Start with the essentials. You don’t need expensive supplies to begin.
Traditional Tools:
Sketchbook or Blank Paper #ad
Graphite Pencils #ad
Black Ink Pens or Fineliners #ad
Colored Pencils #ad
Markers #ad
Watercolors #ad
Optional Digital Tools:
iPad + Apple Pencil (or other tablets)
Drawing apps like Procreate, Adobe Fresco, or Photoshop
Tip: Start with pencil and paper to learn the basics of control and flow, then explore digital tools if you’re interested.
2. Learn the Fashion Figure (Croquis)
Fashion illustrations use elongated figures (typically 9-10 heads tall vs. the real human average of 7-8). This helps highlight clothing and elegance.
Study basic human anatomy and poses
Practice quick gesture drawings for movement
Use croquis templates as guides (many are free online)
Gradually move toward sketching your own figures
Tip: Don't aim for realism—go for fluidity and expression!
3. Understand Clothing and Fabric
To draw clothing convincingly, you need to understand how fabric behaves.
Observe how different fabrics (silk, denim, tulle) drape, fold, and stretch
Practice drawing wrinkles, seams, and folds
Study fashion magazines, runway photos, and real garments
Tip: Focus on key garments like dresses, jackets, and pants, then explore complex pieces later.
4. Learn Basic Fashion Design Elements
Familiarize yourself with:
Garment types (bodices, skirts, collars, sleeves, etc.)
Silhouettes (A-line, fitted, oversized)
Fashion terminology and trends
You don’t need to be a designer to illustrate fashion, but a little knowledge goes a long way in making your drawings feel intentional.
5. Develop Your Style
Experiment with different techniques and media to find your unique artistic voice.
Try ink-only drawings, minimal line art, or detailed watercolor paintings
Mix digital and traditional media
Study different illustrators (e.g., David Downton, Megan Hess, René Gruau)
Tip: Create moodboards or save inspiration on Pinterest or Instagram.
6. Practice Regularly
Consistency is key. Try to draw a little every day or set a weekly goal (e.g., 3 outfits or one full-page composition).
Redraw outfits from fashion shows
Create themed illustrations (e.g., street style, vintage, couture)
Join online challenges (e.g., #FashionIllustrationFriday)
7. Share and Connect
Start putting your work out there. Fashion illustration is also about communication and style storytelling.
Share your work on Instagram, Pinterest, or Behance
Follow other illustrators and engage with the community
Consider starting a portfolio or blog to document your progress
Bonus Tips:
Use references! They help you improve faster.
Don’t aim for perfection—aim for progress.
Save your sketches so you can track how much you grow.
For more in-depth visual guidance, visit YouTube and search for "how to create a fashion illustration". You'll discover a variety of inspiring videos from fellow enthusiasts to help spark your creativity and keep you motivated.

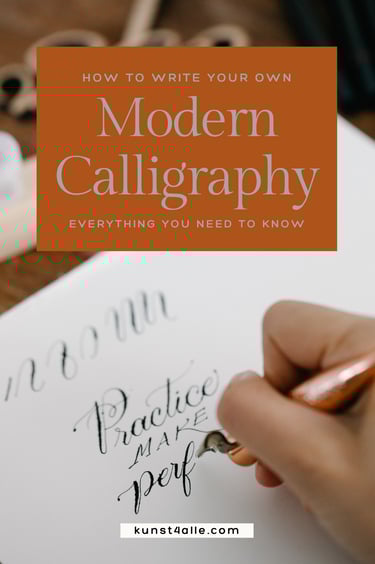
How to Write Your Own Modern Calligraphy
Unlike everyday penmanship, calligraphy emphasizes form, flow, and often follows strict aesthetic rules depending on the style or script.
Creating modern calligraphy involves a blend of artistic flair, technique, and practice. Here's a step-by-step guide to get you started with modern calligraphy.
Please note, that as an Amazon Associate we earn from qualifying purchases.
Let's get started!
1. Gather Your Materials
You’ll need:
Brush Pen #ad
Fountain Pen and Ink #ad
Quality Paper (smooth, bleed-proof paper) #ad
Pencils (for sketching) #ad
Eraser (for sketching) #ad
Ruler (optional, for guidelines) #ad
Practice Sheets (help build muscle memory) #ad
2. Understand Basic Strokes
Modern calligraphy is built from 8 fundamental strokes:
Upstroke – Thin, light pressure
Downstroke – Thick, heavy pressure
Overturn – Light to light
Underturn – Heavy to light
Compound curve – Light > heavy > light
Oval – Continuous curve
Ascender loop – Loop above the midline
Descender loop – Loop below the baseline
Practice these repeatedly.
3. Learn Letterforms
Start with lowercase letters:
Use basic strokes to form letters.
Break letters into parts (e.g., “a” = oval + underturn).
Focus on consistent slant, spacing, and pressure.
Then move to:
Uppercase letters (more flourish and variation)
Connecting letters (work on fluidity and rhythm)
4. Practice with Words
Once confident with individual letters:
Begin forming simple words.
Focus on even spacing and consistent baseline alignment.
Practice common words or phrases (like “hello,” “love,” “thank you”).
5. Add Your Style
Modern calligraphy allows flexibility and creativity:
Vary baseline – Bounce letters slightly
Mix fonts – Combine cursive with print
Add flourishes – Extend strokes decoratively
Play with sizes – For emphasis and visual interest
6. Use Guidelines
Draw light pencil lines to help with:
Baseline (where letters sit)
X-height (height of lowercase letters)
Ascender/descender lines (for tall and looping letters)
7. Create a Final Piece
Lightly sketch your layout with pencil.
Use your calligraphy pen to ink over.
Let it dry, then erase guidelines.
Embellish with color, watercolor wash, or digital enhancements.
8. Practice Regularly
Set aside time weekly or daily.
Try different styles (elegant, whimsical, minimal).
Follow calligraphy artists for inspiration.
Bonus Tips:
Don't rush—focus on control, not speed.
Use your whole arm for larger strokes.
Warm up before writing (like a dancer stretching!).
For more in-depth visual guidance, visit YouTube and search for "how to write modern calligraphy". You'll discover a variety of inspiring videos from fellow enthusiasts to help spark your creativity and keep you motivated.
How to Create Your Own Oil Painting
In a world driven by digital speed, oil painting remains a slow, contemplative craft. It asks us to look closely, to express emotion with texture, to honor the beauty of detail.
Creating an oil painting is a rewarding process that involves several steps, from preparing your surface to applying the final touches. Here's a step-by-step guide for beginners:
Please note, that as an Amazon Associate we earn from qualifying purchases.
Let's get started!
1. Gather Your Materials
You'll need:
Oil Paints #ad
Brushes (various sizes/shapes) #ad
Canvas or Canvas Board #ad
Palette
Wood #ad
Acrylic #ad
Glass #ad
Disposable #ad
Palette Knifes #ad
Linseed Oil or another medium (e.g., Galkyd, Liquin) #ad
Odorless Mineral Spirits or Turpentine (for cleaning) #ad
Easel (optional but helpful) #ad
Rags or paper towels
Apron or old clothes #ad
2. Prepare Your Canvas
Pre-stretched canvases usually come pre-primed with gesso. If not, apply 2–3 layers of acrylic gesso, letting each dry before adding the next.
Lightly sand between coats for a smoother surface if desired.
3. Plan Your Composition
Create a rough sketch of your painting on paper or directly on the canvas using:
Graphite pencil, charcoal, or thinned oil paint (burnt umber or ultramarine works well).
Decide on the focal point, values, and color scheme.
4. Tone the Canvas (Optional)
Apply a thin wash of neutral color (like burnt sienna or raw umber mixed with solvent) to remove the stark white of the canvas and unify the painting.
5. Block In Basic Shapes
Use diluted oil paint (mixed with solvent) to loosely block in large areas of color and composition.
Focus on shapes and values, not details.
6. Begin Building Layers (Fat Over Lean)
Lean layers (more solvent, less oil) go underneath.
Fat layers (more oil, less solvent) go on top to prevent cracking as the painting ages.
7. Develop the Painting
Work from dark to light and thin to thick.
Gradually refine shapes, colors, and edges.
Add details with smaller brushes.
Use a palette knife for texture or bold marks.
8. Let Layers Dry (If Working in Stages)
Oil paint dries slowly. Allow days or weeks between layers, depending on thickness.
Speed up drying with alkyd mediums (like Liquin).
9. Final Details
Add highlights, crisp edges, and fine details.
Step back frequently to assess your painting as a whole.
10. Dry and Varnish
Let the painting dry completely (can take 2–6 months depending on thickness).
Apply varnish to protect the surface and unify the finish (matte, satin, or gloss).
Bonus: Clean Up
Clean brushes with mineral spirits or brush cleaner.
Store leftover paint safely; dispose of solvents properly.
For more in-depth visual guidance, visit YouTube and search for "how to create an oil painting". You'll discover a variety of inspiring videos from fellow enthusiasts to help spark your creativity and keep you motivated.
Kunst4Alle
Art for Everyone
Your guide to art supplies and techniques.
Please note, that as an Amazon Associate we earn from qualifying purchases.
Please also visit us at FineArtAmerica and Etsy.
Support
© 2025. All rights reserved.